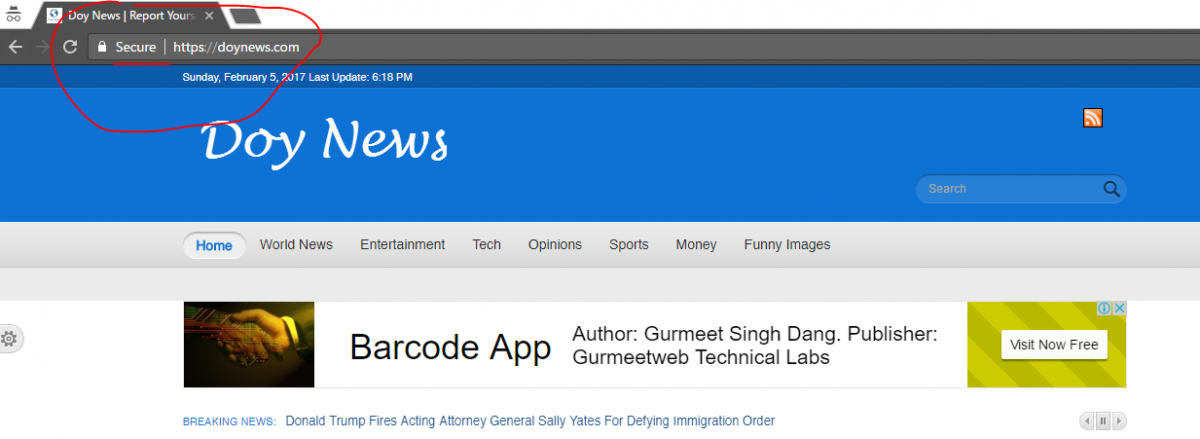
One of the myths for most web-designers is that an encrypted site, or a site using HTTPS is only for E-commerce websites, or any other large websites. SSL before now is mostly used by websites that process sensitive information, especially with Paypal or third party gateway services.

Though we don't handle any payment services on Doynews, but it is important that our website is secure for our visitors, no matter the country they reside. This will also protect browsing history when they visit this site, prevents third party tampering, encrypts all communication and most important of all is that it increased Google ranking.
When Google says you do it, do it.
SSL is not cheap, but there are also various ways to install free SSL on your website to have the "HTTPS"
How To Activate Free SSL Via CloudflareOn Your Website
1. Step one - sign up to CloudFlare
Sign up for cloudflare to be able to use their services. Cloudflare doesn't just give you free SSL, using their SSL service will make your website faster. To sign up, click here
2. Step Two - Add your website URL To Cloudflare
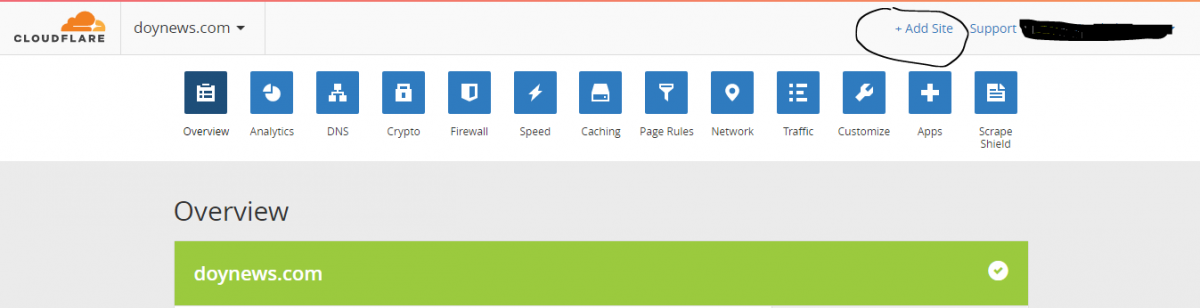
Cloudflare will automatically detect your website and make sure to activate your A record in Cloudflare and the www type in your cloudflare. Do not activate the mail, as this might hinder you from getting email messages from your website to the email client, unless you want to set up the mail account again, let just disable it for the sake of this tutorial.
Cloudflare will then give you two nameservers, go to where you host your domain name, maybe Godaddy, Namecheap and make sure to change the nameservers in your account to the new Nameservers given by cloudflare.
Cloudflare nameservers since i guess you are using the free account will look like this; Taku.ns.cloudflare.com, Kiki.ns.cloudflare.com. Please note this are just sample and not real Nameserver addresses.
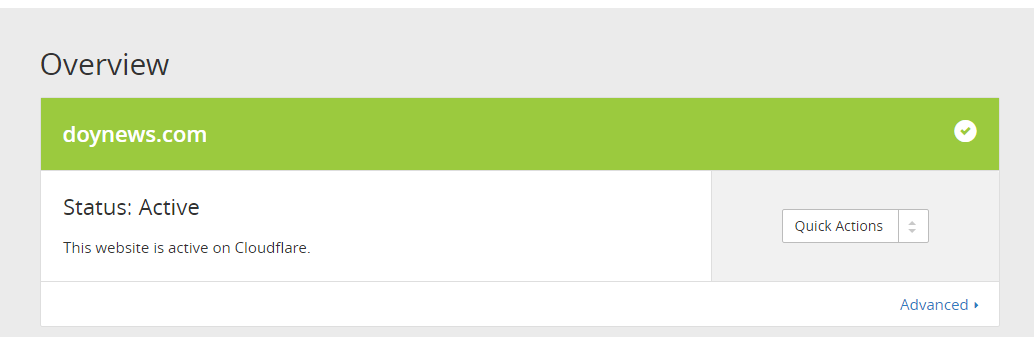
When this is done, your website will change from pending Status to Active.
PS: If you have problems with changing your nameserver, please contact your domain hosting provider for help, or use your cpanel to activate cloudflare as many host providers pre-installed it on their cPanel.
3. Step Three - Enable SSL Rule
To enable the SSL for your domain, click the Crypto menu, and on the SSL tab, select Flexible.
Flexible allows cloudflare to connect to your website as intermediary by making sure user is getting the encrypted data/information, while your website communicate with it by HTTP, thereby securing the website.
Full SSL means that the connection between the website and the user is HTTPS, and also with the user.
Full SSL (Strict): Like Full SSL, but Cloudflare will need to see a certificate installed on your web server, which also means a certificate you have purchased already...
So we will choose "Flexible" for this, as we are using Free SSL package.
4. Step Three - Set The SSL Page Rule
Click the Page rule on the Cloudflare menu, to set up a page rule for the website
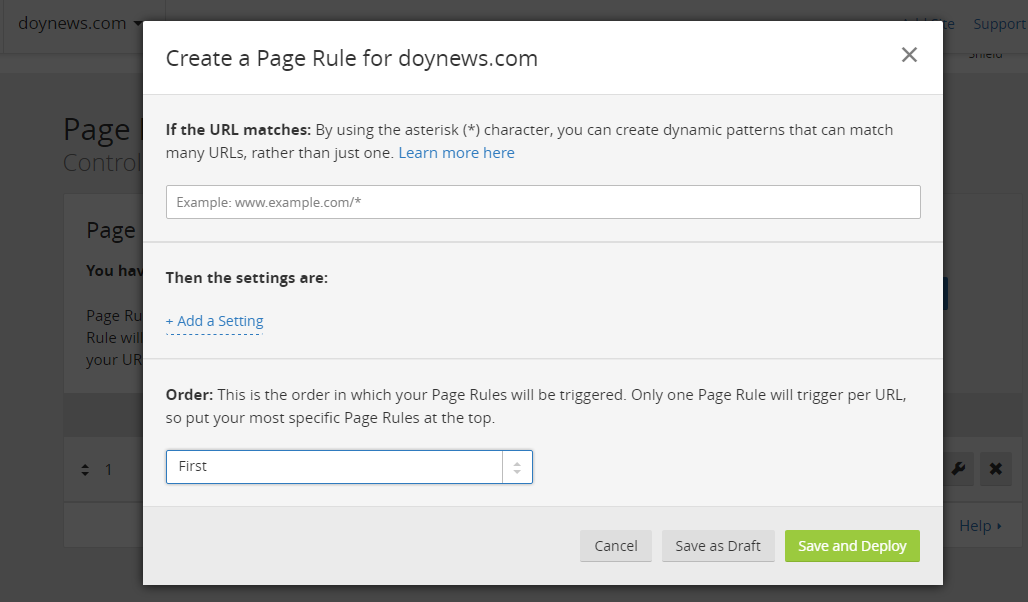
In the page rule setting, insert your website URL, like this "http://doynews.com" and in the settings, select the "Always use HTTPS". and click n save and Deploy.
Go ahead and refresh your website now, the website should now run on SSL, and it will now start showing "HTTPS"