For the past few years, E-commerce business is one of the lucrative business for physical stores. A lot of stores have seen increases in their sale since they have introduced E-commerce site. So are you willing to introduce E-commerce to your business, but the fee of the web-designer scared you off. I will show you step by step on how you can get your own E-commerce store online and host it and start increasing those sales you always dream about. Let us use a case scenario to get things going ASAP.
Case Scenario : Andy sports shopping centre is the name of your newly open shop. You sell sports equipment for sports like Football, Table tennis, Tchoukball and Badminton. You have decided to take your business online by adding E-commerce to your business. Because of low budget, you have decided to create your own online store so that people can pay you via Paypal and credit Card. You have a computer ready and not knowing where to start or how to begin.
Now you are Andy and we are going to create a new online store for you. Let's go.
So we will be building our website on a local machine (that is your computer) before we send it online. It is ok to go online and do it too, but for the purpose of this tutorial, we will first finish up our website on the local machine before uploading it to our web hosting company.
Before we continue, please Download Xampp. Xampp is our local server, we have other development environment like WAMP.I prefer Xampp, so we will use Xampp. Go ahead and install Xampp.
Installing Xampp is quite easy, so I will just give you a summary of it's installation
![]() Click the Xampp .exe file you downloaded. To save yourself from any error from popping up, right-click the setup icon and run as administrator.
Click the Xampp .exe file you downloaded. To save yourself from any error from popping up, right-click the setup icon and run as administrator.
![]() You will find it asking for language, I will select English. Choose the language appropriate for you.
You will find it asking for language, I will select English. Choose the language appropriate for you.
![]() Xampp will install on your "C" drive, you don't need to change it unless you know what you are doing. The right installation would be C:\XAMPP.
Xampp will install on your "C" drive, you don't need to change it unless you know what you are doing. The right installation would be C:\XAMPP.
![]() Click Next. In the case where you see "SERVICE OPTIONS" check the
Click Next. In the case where you see "SERVICE OPTIONS" check the
"Install apache as service"
"Install my SQL as service
You can leave the "Install filezilla as service" now. What you just did will make the services always start up every time on your system, the services includes : PHP, MYSQL and APACHE. If you are working with a low RAM or you don't plan to keep working on your project every time, you can uncheck them and start XAMPP manually every time you plan on using it.
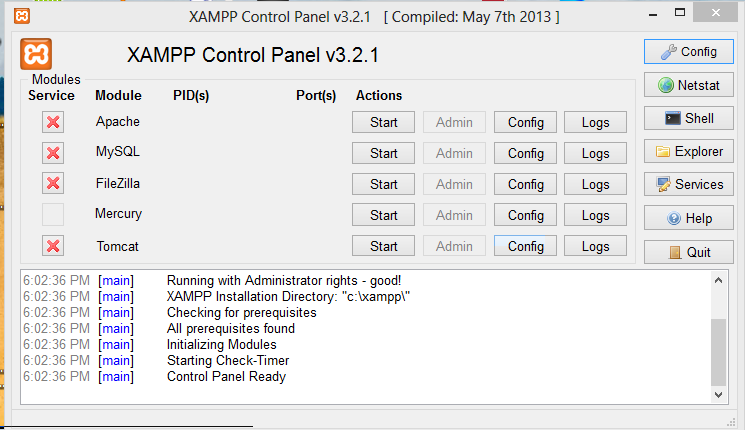
Click INSTALL and go sell some shoes now, the process might take a while before it is done. When it is finally done, click Finish and wait till you see this
NB : You should see this if all goes well.
If you have some application running on your computer, it might block this application from running, Skype might be a problem as you can see below.
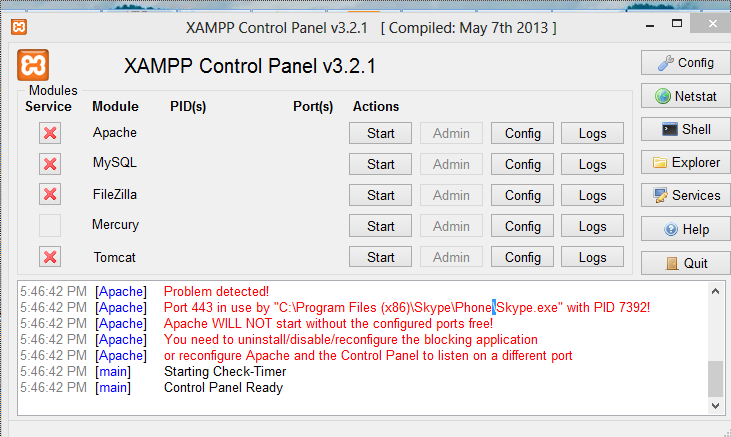
Stop any application that you see in red and start again. Always start the application with administrator privileges.
Click On Start on Apache, and also Start on MYSQL. In a few seconds, the 2 services will start running, the start button will change to STOP now.
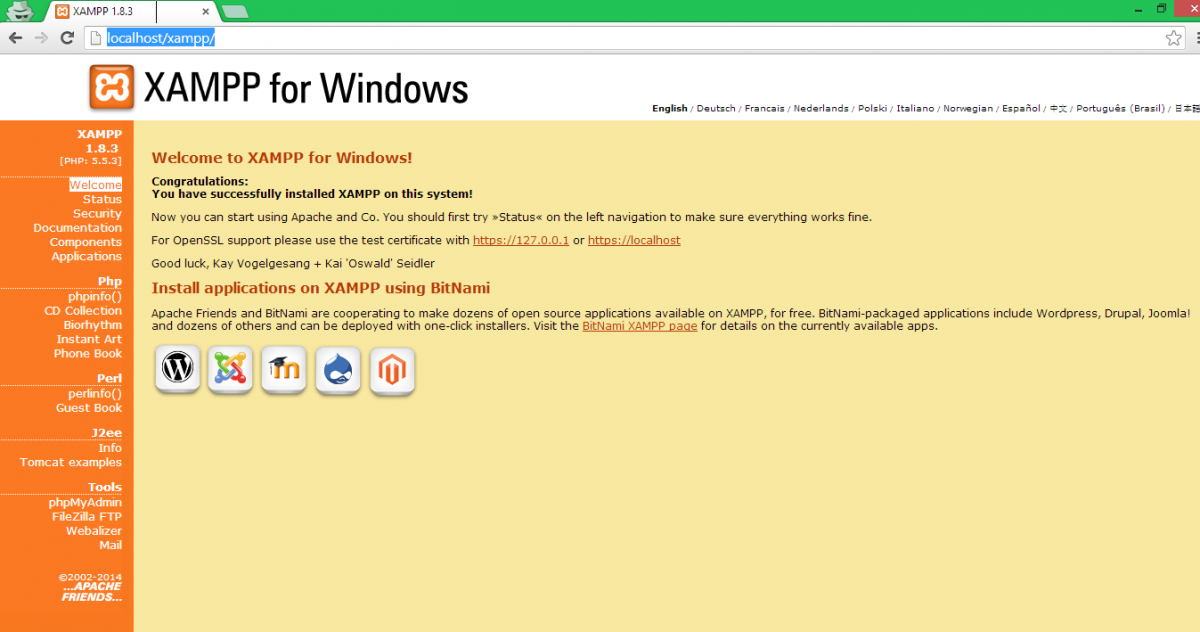
![]() To confirm that everything is working great, type Localhost/xampp on your browser(Google Chrome, Firefox or Opera). and you will find the picture below.
To confirm that everything is working great, type Localhost/xampp on your browser(Google Chrome, Firefox or Opera). and you will find the picture below.
If this is done....You have done a great Job today...Go ahead and sell some shoes now, but before you go, Open your browser and download OpenCart.
For this class, we will be using OpenCart to create our online store, OpenCart is one of the best Open source software that allows you to create flexible and robust eE-commerce solution for your store. A lot of big E-commerce store use this solution and it is very easy and you don't need to be a pro to use OpenCart. In our next class, i will show you how we can install OpenCart and start our new E-COmmerce store for Andy sport shoe. I will also give you reasons while you should use it as well. So download OpenCart now.
Learn E-COMMERCE NOW...Follow this blog for tutorials that will help you. Feel free to ask questions via comment below