If you are here and about to enjoy this good read, i will advise you go ahead and read my previous post on the set-up you need to start this. You might be lost if you did not go ahead to read my previous post, check my post on setting up E-Commerce store here.
At the time of writing this post, the current version of OpenCart was the 1.5.6.4 version. And we are going to install it on our local machine as we have set up our local machine server yesterday. Go ahead and start your Xampp now.Whiel Xampp is running, go ahead and copy your zipped OpenCart file you downloaded into this location
Drive C--->xampp--->htdocs---> Your zipped file
When you install xampp, it automatically creates a xampp folder inside your C: drive as you can see. Also note that, you can unzip your OpenCart file and copy it straight into the location above.
After you have unzipped the whole OpenCart zipped folder, look inside the folders, and you will find
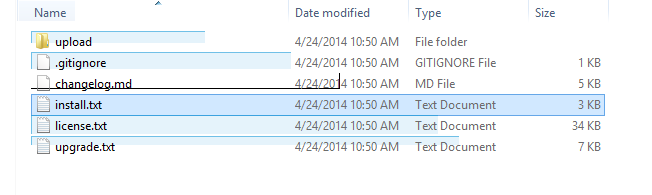
Image :1
But before moving on, the unzipped folder name will be OpenCart 1.5.6.4, we don't want that name for now, so change the folder name to anything you like. But because we are doing this for Andy sports shopping centre, the name of the folder will be Andy. (You will see reason for this in few minutes)
When you have done this, now go ahead inside the Upload folder you see in Image :1 and copy all files inside it and copy it straight out inside the Andy folder you renamed, which means when you click on the Andy Folder, it will display all files inside the upload folder, you can go ahead and delete the upload, .gitignore, changelog md, install.txt. license.txt, upgrade.txt. Of course you can leave them if you want, they won't affect your work.
So you will have this if you do the right thing :
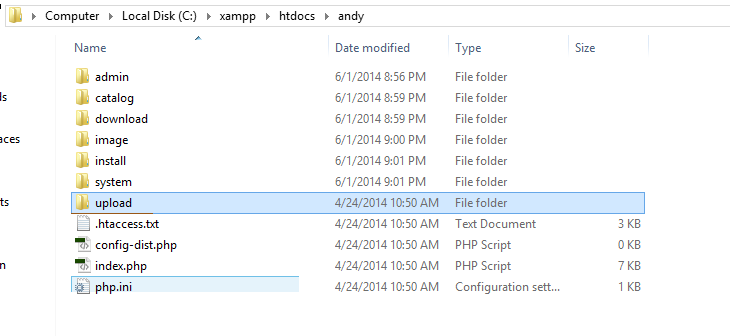
Image : 2
Which also means your file location would be C:\xampp\htdocs\andy . When you click on Andy from HTDOCS, you should see the Image: 2 above...Get it?
STEP 2
Hope you are enjoying this tutorial so far? If you encounter any problem, write a comment. Now launch a browser (Google chrome, Mozilla firefox, Opera) and type in http://localhost/andy/. If you folder name is not andy, then go and change it now or use a simple name you can use from here. Any name is fine, but Andy is my story and am sticking with it .
.
In your browser you should see this exact screen
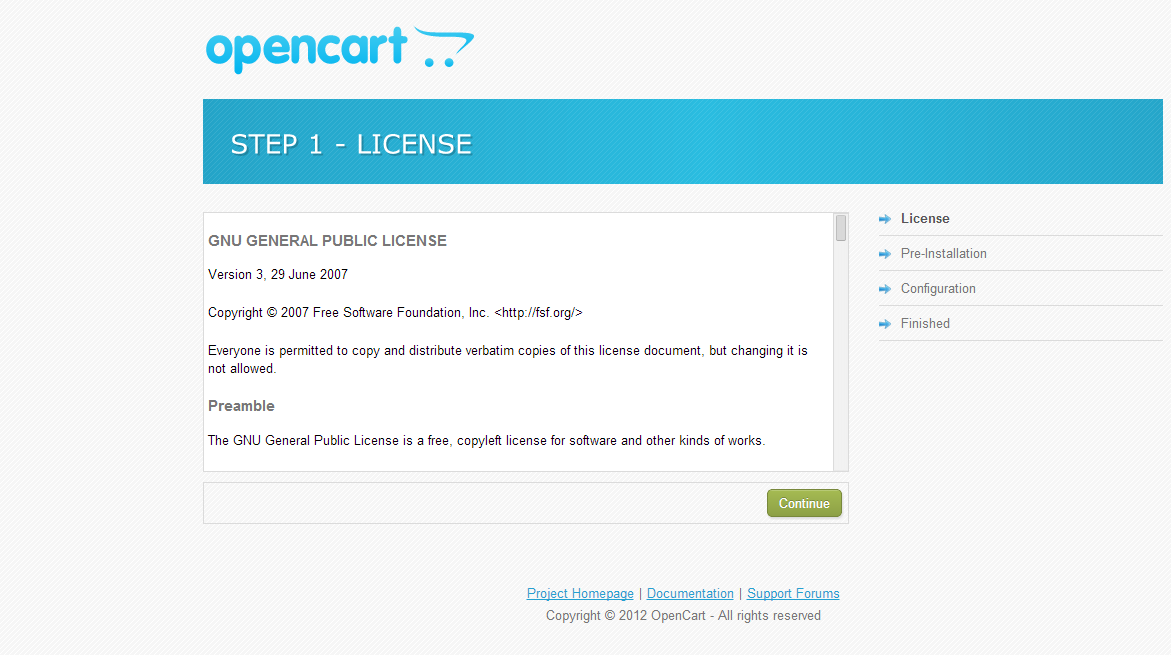
Image:3
When you see this file, you are the new version of Rick Ross, because you are a boss.Ok you don't like Rick Ross.. you are the new version of _________ (Insert name in blank space).
Click Continue and you should see this :
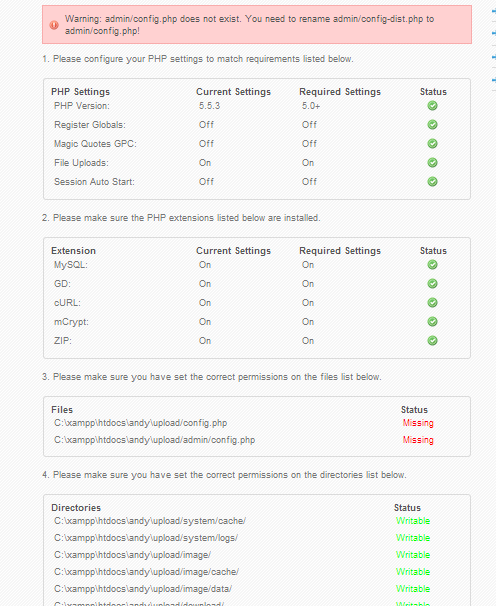
Image : 4
This is the pre-installation screen, it checks that all the settings, files and everything that will give you a smooth breakthrough to your Online store is in place. As you can see now, i encountered 2 red flags, maybe you won't see this, but if you do, don't panic. Just relax and let us fix it.
Go back to Andy's folder in your directory on C drive, open the admin folder. You should see a file with config-dist.php inside the admin folder, remove the "-dist.php" and refresh the page again.
You have cleared a red flag, now you need to clear the next one:
Now when you open the Andy's folder directly, there is another config-dist.php file, remove the "-dist.php" and you should be fine and move to this next stage. Check the image below.
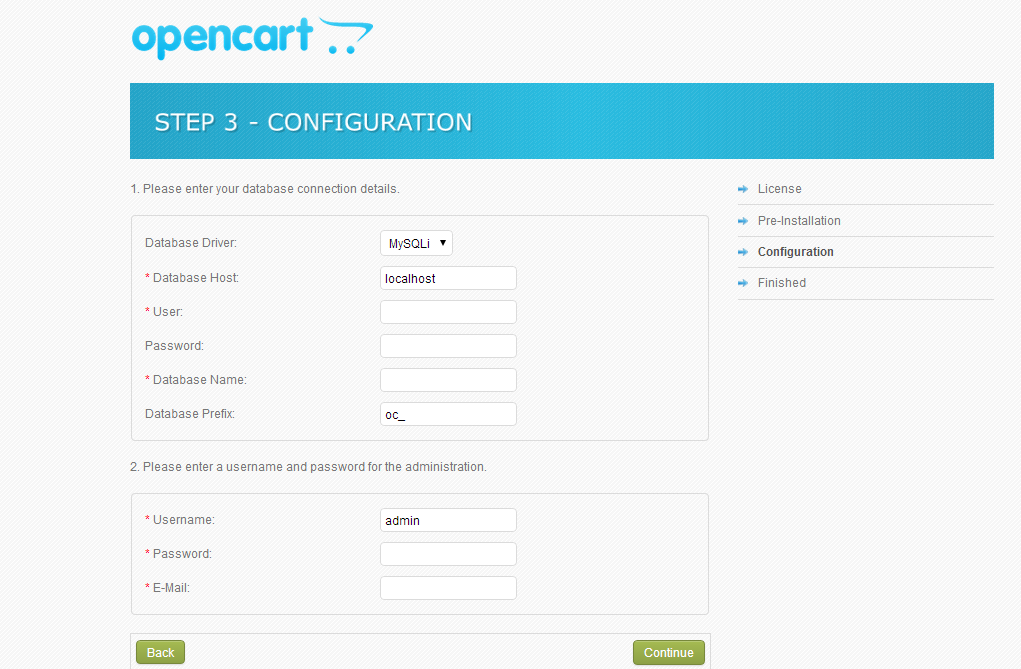
Image:5
NB: Go ahead and have that coffee now if you need one or stretch a leg if you bored... (Intermission : FIFA 14).
Welcome Back
If you notice ON THE Image:5, you see we have Database name, Database Username and password. You will need this information for your online store.
A database in a lame man's definition is where all information from your store will be saved, this will includes all products in your store, username and password of your store users and everything relating to your store. It is the heart beat of your online store, so always keep that in mind.
Now it is time you go to a new tab on your browser and type this : http://localhost/xampp/. At the left side of the menu, look for Phpadmin and click it. You will find this :
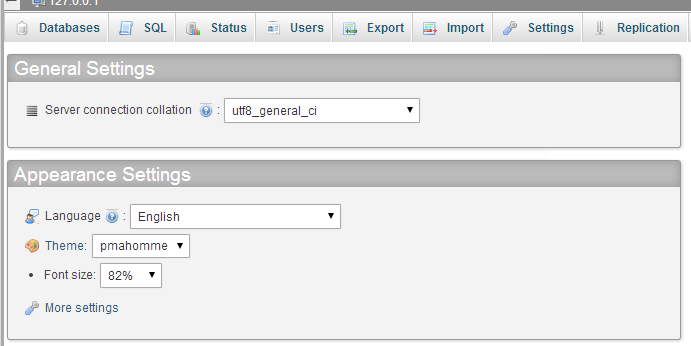
Image:6
Create A Database
To create a database for your project, click on the database tab as shown above
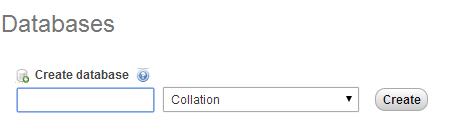
Image: 7
Now give your database a name, give it a very easy name, i will call my database shoestore (lowercase, no character). When that is done, it will prompt you to create a user for this database if it is your first time creating a database on Xampp.
If you don't want to create a user, your default username and password is root. It should work. You don't need to worry much about this, because you will change some information when you upload the website to the web hosting company, this is just for local host, so don't be scared or anything.
Go ahead and enter the information you are seeing here :
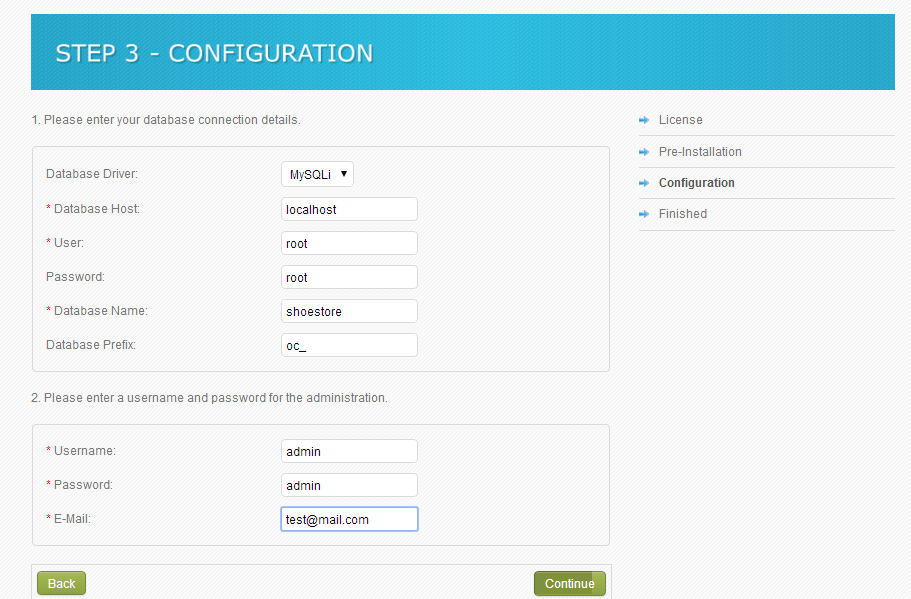
Image: 8
NB : I want you to create a new user for this project. Click the add new User
![]()
Image :9
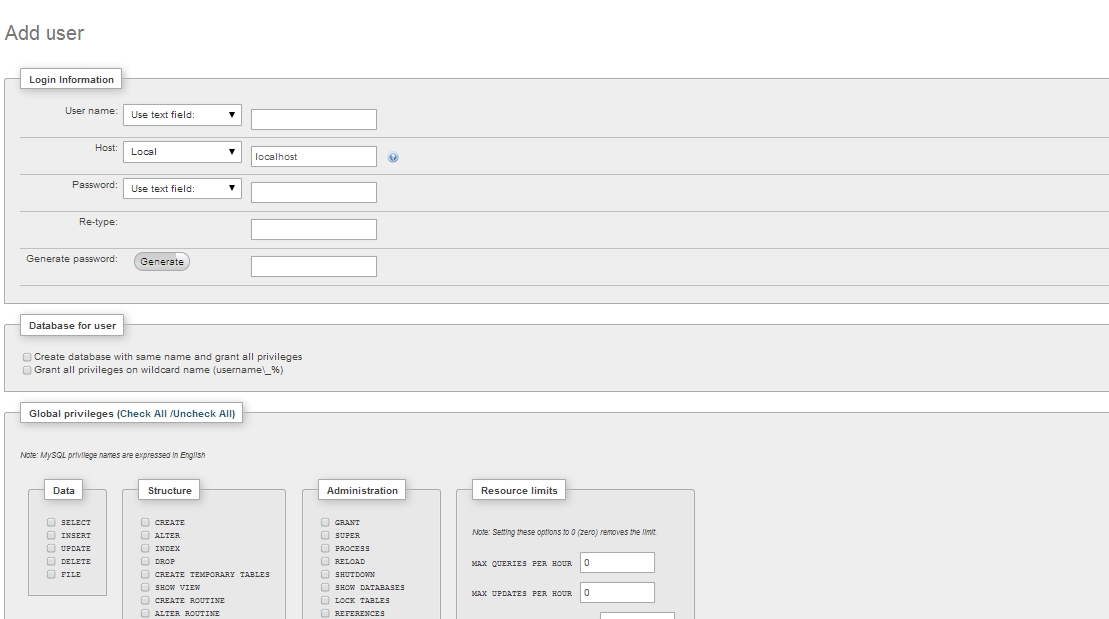
Image : 10
Now enter this information
Username : Test
Host : Select Local, and the field will turn to LocalHost
Password : Use anything, try 123456
Global privileges: Check All
Click Go
Your new user test is now created. You need to grant the new user the privilege to access the shoestore database.
So click on Edit privileges, and from the picture below, click the drop down and find the shoe store database and click GO. If it shows permissions, make sure you check all and save it as well. Now you are done.

Image : 11
So if you are having problem with root like I did, this is an alternative, you might not have problems, but it is also likely you do...I just want to cover the bases, so you won't get tired here.
Now go back to theimage 7 and this will be your new information if you created a new user.
User : Test
password :123456
Database:shoestore (make sure you type the write thing. I advise you copy and paste it if possible)
Other data can remain as it is for now, Click Continue and you should see the next screen.
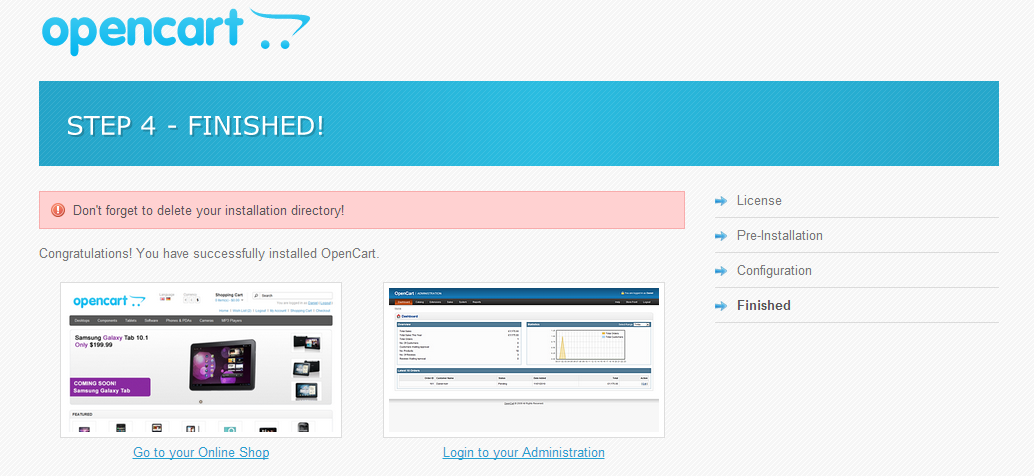
Choose any option you like, go ahead and choose "Login to administration" or "Go to your online store"
As you can see, we are all done and ready to go. So what happens next? where do we start from? How do we start selling and making cash? This and many more questions will be answered in the third section of this tutorial..If you read to this stage, you are so determined to learn and did a great job for yourself. Knowing these steps will help you install 95% of all CMS (Wordpress, joomla,Drupal and many others) because they all use the same pattern. Keep checking as I start work already on the third tutorial immediately...
Share with friends, feel free to comment and check for the 3rd series
Read the last section here
Cheers