This is another section of DIY(Do-IT-Yourself) section, but we will be completing our store profile this week. Before now, i have shared with you on how you can set up your database with pictures, and many other technical parts. This is the third section, am not sure it is the last part, but if it is, i am happy to have shared this knowledge with you. Check out my previous post here.
DIY: How To Set Up Your own E-commerce Website (technical section) Part 2
DIY: How To Set Up Your own E-commerce Website Part 1
Let's help Andy set up his shop now, you might notice an error message on your website, "Warning: Install folder still exists and should be deleted for security reasons!" just go to your andy's folder and delete the "Install" folder.
Now, let's do the first thing, go to your dashboard on the admin directory of your website, in the dashboard, click on system >> settings
![]()
Image 1: Dashboard
Some basic changes you need to do is change your store name and let's change your logo
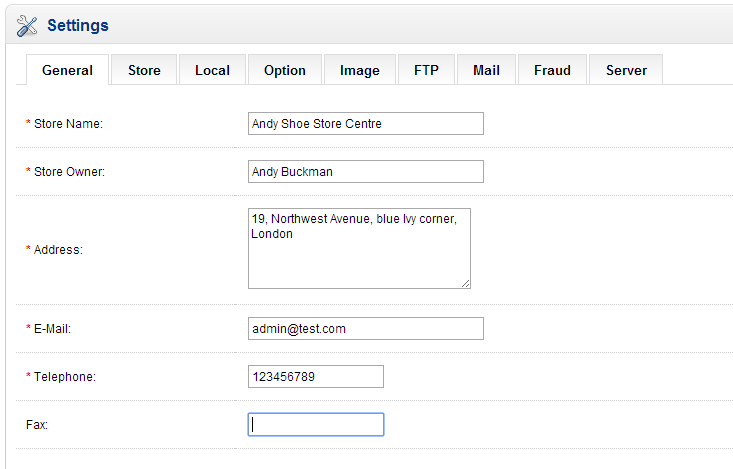
Image 2: Your store settings
Go ahead and play with the different tabs above. The next one I like you to see is changing your logo, we need a good logo that will show people they are at Andy's store.. Go ahead and upload a logo by going to the "Image" tab.
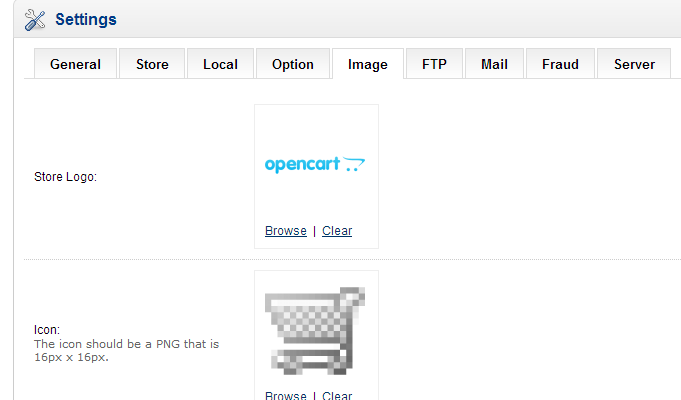
Image 3: Logo settings
Now, go ahead and clear the default logo and upload the new logo of your choice, you can resize your logo image to 100 by 50 for this sample. OpenCart won't reduce for you.
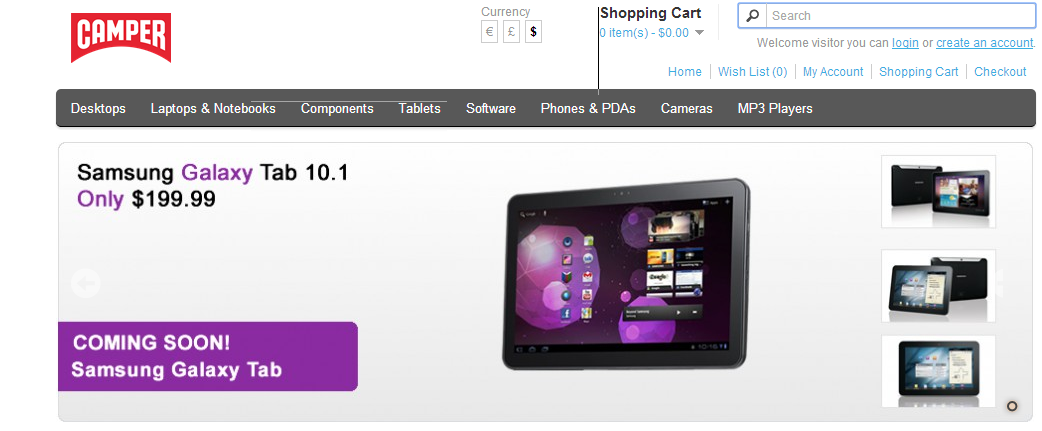
Image 4 : I just changed my logo to "Camper"
Also if you take a look at your browser tab, you will notice some changes to the store name now...Now let's move on.
Categorizing your product
This is an important section of your store. As a Sports center selling different sport gears, you need to make it easier for people searching for the sport gears they want to buy.Navigation is one thing you must always do when making your website. So now we will categorize your sport gears into different places.
First we will sell Shoes. Since football shoes are different from Tennis shoes, we need to make sure people that need tennis shoes navigate to their section and football lovers can go ahead and get Football shoes..
So that means we will create a Tennis shoes and football shoes category.
Now go back to your store and let us do that.
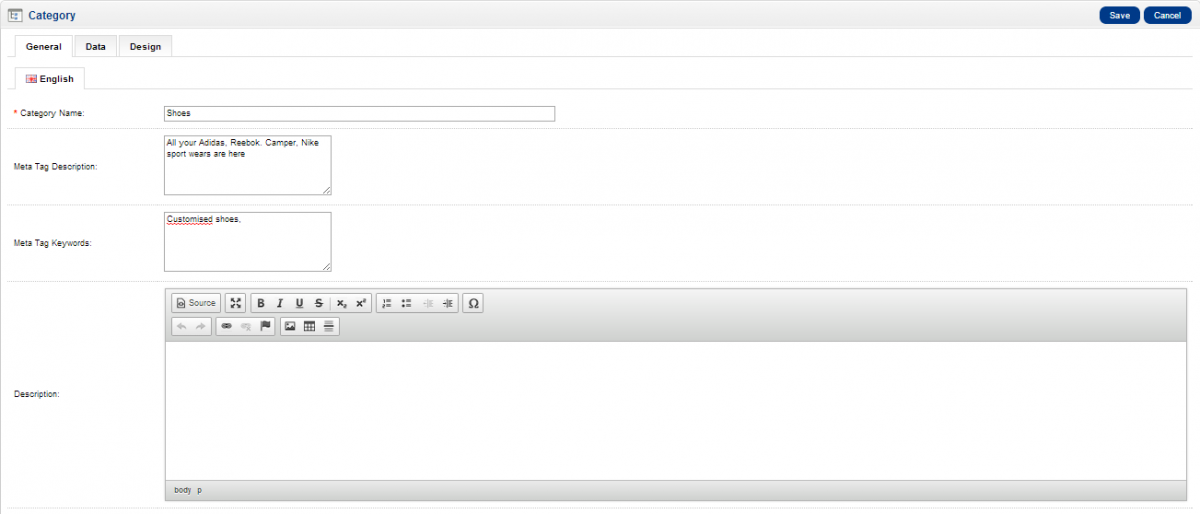
Click on Catalog>>categories . You will find some demo categories listed by default by OpenCart, go ahead and delete them later. For now, click on Insert on the dashboard and add your new category : Shoes

That is an overview of what you need to do...
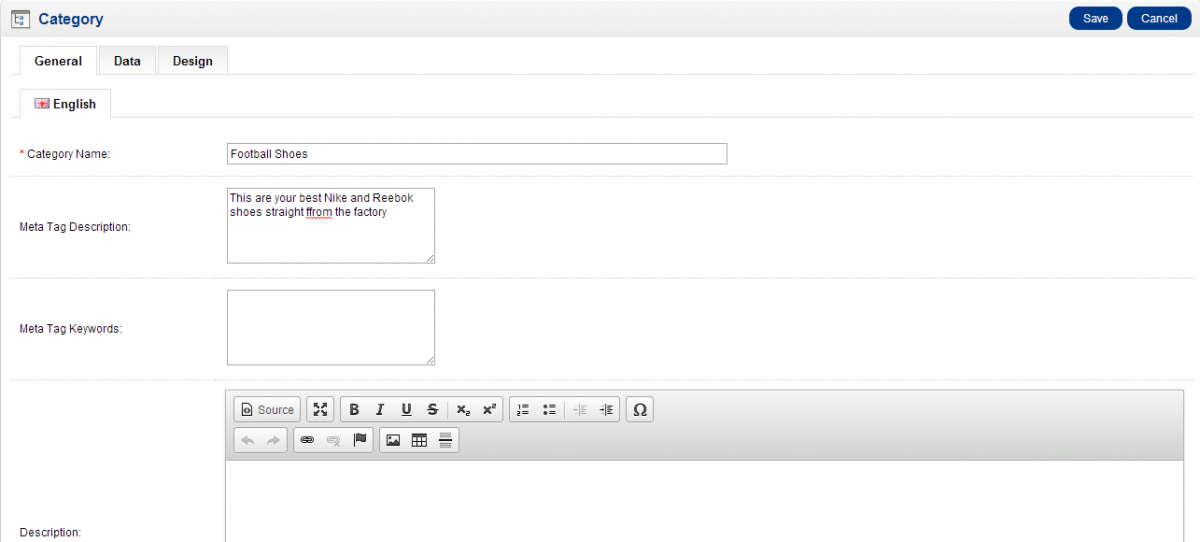
When you are adding new catalog, you will find 3 tabs (General, Data, Design)
Let me skim through the important ones we need for this tutorial.
![]() Category Name: The name of the category.
Category Name: The name of the category.
![]() Meta Tag Description: Meta Tag Descriptions are used by search engines to describe the content of your web site.
Meta Tag Description: Meta Tag Descriptions are used by search engines to describe the content of your web site.
![]() Meta Tag Keywords: Meta Tag Descriptions are used by search engines to describe the
Meta Tag Keywords: Meta Tag Descriptions are used by search engines to describe the
content of your web site.
![]() Description: A description of the category.
Description: A description of the category.
Data Tab
![]() Parent Category: If you are creating a sub-category, then it needs to be under a parent category. Example : A football shoe is a type of shoe, so when you create a catalog for football shoe, on the parent category, write "Shoe" Open cart will autocomplete the word, click it and the sub-category will go right under the parent category...
Parent Category: If you are creating a sub-category, then it needs to be under a parent category. Example : A football shoe is a type of shoe, so when you create a catalog for football shoe, on the parent category, write "Shoe" Open cart will autocomplete the word, click it and the sub-category will go right under the parent category...
![]() Stores: If you have more than one store. You can select it here. Skip this place as we have just 1 store at the moment.
Stores: If you have more than one store. You can select it here. Skip this place as we have just 1 store at the moment.
![]() SEO Keyword: Enter some keywords here to help in search engine optimization. Put yourself as the user, if you need shoes, how will you search it on google or bing?
SEO Keyword: Enter some keywords here to help in search engine optimization. Put yourself as the user, if you need shoes, how will you search it on google or bing?
![]() Image:Insert an Image that will be displayed along the new category. Upload a photo
Image:Insert an Image that will be displayed along the new category. Upload a photo
![]() Top: If you want this category to be displayed on the menu bar on your website homepage. Only select this option for parent category, sub category will automatically appear below it
Top: If you want this category to be displayed on the menu bar on your website homepage. Only select this option for parent category, sub category will automatically appear below it
![]() Columns: Number of columns to use for the bottom 3 categories. Only works for the top
Columns: Number of columns to use for the bottom 3 categories. Only works for the top
parent categories.
![]() Sort Order: This is how you want the menu to be displayed on the menu on your menu bar. Do you want shoes to come before sport wears? if yes, then shoes can be number 2 and sport wear will be number 3...Get it?
Sort Order: This is how you want the menu to be displayed on the menu on your menu bar. Do you want shoes to come before sport wears? if yes, then shoes can be number 2 and sport wear will be number 3...Get it?
![]() Status: Enabled for category to display in the online store or Disabled to hide category.
Status: Enabled for category to display in the online store or Disabled to hide category.
Let's skip the design tab for now.
Now for your shoes Catalog, go ahead and mark TOP in the data tab and sort order. Refresh your storefront. You should see it now and it will also display the sub-categories which are football and tennis shoes.
Add A New Product
To add a new shoe to your website, follow this step and i also will explain important tabs to you.
To add a new shoe, Choose Catalog>> Products. You will find 12 different tabs here, let me work you through the one we need at the moment.
![]() Product Name: Name of the product. (Reebok shoes)
Product Name: Name of the product. (Reebok shoes)
![]() Meta Tag Description: Meta Tag Descriptions are used by search engines to describe the content of the website/category
Meta Tag Description: Meta Tag Descriptions are used by search engines to describe the content of the website/category
![]() Meta Tag Keywords: Insert keywords here to aid in search engine optimization
Meta Tag Keywords: Insert keywords here to aid in search engine optimization
![]() Description: A description of the product (shoes)
Description: A description of the product (shoes)
![]() Product Tags: These are the words that customers may use to describe this product, or to find the product in your store
Product Tags: These are the words that customers may use to describe this product, or to find the product in your store
Data Tab
![]() Model: A unique model number for this product.
Model: A unique model number for this product.
![]() SKU: SKU stands for “Stock Keeping Unit”, which is a unique, arbitrary number for this product.
SKU: SKU stands for “Stock Keeping Unit”, which is a unique, arbitrary number for this product.
![]() Location: The location of where the product is kept.
Location: The location of where the product is kept.
![]() Price: The price that you want to sell the product(shoe) for.
Price: The price that you want to sell the product(shoe) for.
![]() Tax Class: If the product is taxable to charge tax or none if you don’t want the customer to pay tax.
Tax Class: If the product is taxable to charge tax or none if you don’t want the customer to pay tax.
![]() Quantity: If you wish to track stock levels, then you need to specify the amount that is currently in stock. The stock total will deplete naturally as customers purchase the product.
Quantity: If you wish to track stock levels, then you need to specify the amount that is currently in stock. The stock total will deplete naturally as customers purchase the product.
![]() Minimum Quantity: If you wish to force customers to have to purchase a minimum amount of the product, then you need to specify the value of what you wish that to be.
Minimum Quantity: If you wish to force customers to have to purchase a minimum amount of the product, then you need to specify the value of what you wish that to be.
![]() Subtract Stock: If you wish to track stock levels, then chose “Yes”, otherwise choose “No”.
Subtract Stock: If you wish to track stock levels, then chose “Yes”, otherwise choose “No”.
![]() Out of Stock Status: Sets the stock status message customers will see when the stock quantity reaches 0.
Out of Stock Status: Sets the stock status message customers will see when the stock quantity reaches 0.
![]() Requires Shipping: Sets if the product requires shipping. Set to no if the product is downloadable or if customers will pick up.
Requires Shipping: Sets if the product requires shipping. Set to no if the product is downloadable or if customers will pick up.
![]() SEO Keyword: The keyword used for search engine optimization. This must be globally
SEO Keyword: The keyword used for search engine optimization. This must be globally
Link Tab
![]() Manufacturer: If you have specified manufacturer or brand names in “Catalog ->Manufacturers”, then you can select the manufacturer or brand name you want to display here. Example : You can insert some popular brands you want to be selling on your website, so users can search through the brands on your website too, you need to insert Manufacturers via Catalog ->Manufacturers
Manufacturer: If you have specified manufacturer or brand names in “Catalog ->Manufacturers”, then you can select the manufacturer or brand name you want to display here. Example : You can insert some popular brands you want to be selling on your website, so users can search through the brands on your website too, you need to insert Manufacturers via Catalog ->Manufacturers
![]() Categories: If you have specified category names in “Catalog -> Categories”, then select the category name you want to display here.
Categories: If you have specified category names in “Catalog -> Categories”, then select the category name you want to display here.
![]() Stores: If you have set up multiple stores in System - Settings, select store name(s) in which you want this product to display here.
Stores: If you have set up multiple stores in System - Settings, select store name(s) in which you want this product to display here.
![]() Downloads: If you have uploaded a file for customers to download after purchase, such as an eBook or music file, select the file name from this box.
Downloads: If you have uploaded a file for customers to download after purchase, such as an eBook or music file, select the file name from this box.
![]() Related Products: To suggest related products when customers are viewing this product, begin typing the product name in the box, then select the related product from the dropdown list that appears.
Related Products: To suggest related products when customers are viewing this product, begin typing the product name in the box, then select the related product from the dropdown list that appears.
Atribute Tab
Attributes are features of the product that can be used to compared products side by side by the customer; this is used when deciding on which item to choose using Product Comparison.
Attributes must be previously set up in “Catalog -> Attribute Groups and Attributes.”
Option Tab
This is where you allow your users to select their different options for a product(shoes). A user might prefer a yellow shoe, while another user might prefer a Reebok show with mixed colors. In the option tab, you specify different options for a user when buying products on your website. Note that before you start using this tab, go to Catalog >>Options and fill in different options that will used in your store. Options can be Large, medium, small, colours and many more. When that is done, go to products and fill out the options already created, insert the first letter and OpenCart will autocomplete for you.
![]() Option Name: Begin typing the name of the option for this product, and a drop-down list will appear with all the options that match.
Option Name: Begin typing the name of the option for this product, and a drop-down list will appear with all the options that match.
![]() Required: Choose Yes, if you want the customer to be forced to select an option, or No to let them check out without choosing.
Required: Choose Yes, if you want the customer to be forced to select an option, or No to let them check out without choosing.
![]() Option Value: Examples could be the size of the product so, small, medium or large.
Option Value: Examples could be the size of the product so, small, medium or large.
![]() Quantity: If you are tracking stock, how many of this option you have.
Quantity: If you are tracking stock, how many of this option you have.
![]() Subtract Stock: If you wish to track stock levels of this item, leave at Yes. Otherwise select No.
Subtract Stock: If you wish to track stock levels of this item, leave at Yes. Otherwise select No.
![]() Price: If you wish to charge extra (or less) for this product, enter the amount here. Example: Men’s extra-large t-shirts cost £2 more from the manufacturer. The “+£2.00” will appear in the option box of your store.
Price: If you wish to charge extra (or less) for this product, enter the amount here. Example: Men’s extra-large t-shirts cost £2 more from the manufacturer. The “+£2.00” will appear in the option box of your store.
![]() Price +/-: If you wish to Add the extra amount, i.e. £2 more for this option, select “+” If you wish to discount this option, select “-”.
Price +/-: If you wish to Add the extra amount, i.e. £2 more for this option, select “+” If you wish to discount this option, select “-”.
![]() Reward Points: If you wish to give Reward Points for purchasing this option, which customers can redeem for additional merchandise, enter the number of points. Turn Reward Points On or Off in Extensions- Order Totals - Reward Points.
Reward Points: If you wish to give Reward Points for purchasing this option, which customers can redeem for additional merchandise, enter the number of points. Turn Reward Points On or Off in Extensions- Order Totals - Reward Points.
![]() Weight: Enter the weight of this option IF it is significantly heavier or lighter than the normal option to charge extra (or less) in shipping this option.
Weight: Enter the weight of this option IF it is significantly heavier or lighter than the normal option to charge extra (or less) in shipping this option.
Image
This area allows you to add additional product images in addition to the main product image. These images will appear on the product page in the Images tab.
To add additional images, click the Add Image Button to bring up the Image Manager, and
select the additional image from your computer.
To replace an additional image, click the picture and select the photo from your computer.
To remove an additional image, click the Remove Button.
This are the important tabs we will be using for our store...Now go through it and practice them on your own.... Go ahead and delete all default data of OpenCart and have just own products in the store.
Feel free to send questions via comment, share with friends. Also if you would like to have your E-commerce website, go ahead and check D-Software Technology, send them an email now to help design your website at affordable rates...
References
Creative Stream E-commerce guide, OpenCart E-commerce